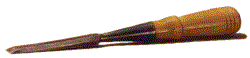
Name Philippine Mahogany (Lauan)
Location Malaysia
Texture/Grain Medium/Open
Specific Gravity 0.54
Hardness Soft
Strength Strong
T/R Stability 8.0/3.8%


Guide

Woodworking
Know-How

Woodworking
Tools

 Up     

Sharpening

1. How a Tool
Cuts Wood

2. Sharpening
Know-How

3. Sharpening
Tools & Materials

4. Sharpening
Chisels & Plane Irons

5. Sharpening
Skews & Gouges

6. Sharpening
Parting Tools

(You are here.)

7. Sharpening
Knives

8. Sharpening
Hand Saws

9. Sharpening
Drill Bits

10. Sharpening
Scrapers

11. Touching Up
High Speed Cutters

12. Sharpening
Resources


Looking for
something?

Try these navigation aids:

  Site Map

Site Index

Search the
Workshop Companion

        
Something to share?
Please:

Contact Us!

o sharpen a parting tool or V-gouge, first check the profile. As they come from the manufacturer, many parting tools are ground with the nose slightly ahead of the ears. Because of this, the nose cuts the wood and begins to lift the chip before the ears have a chance to cut the sides of the groove. It makes more sense to let the ears lead the nose so the tool cuts the sides of the groove first, then cleans out the bottom. 

When grinding the bevels, treat the tool as if it were two skew chisels joined at the sides. Each bevel must be ground to precisely the same angle, and you must remove the same amount of stock from both. After grinding the bevels, grind the nose (the point of the V) to the same angle as the bevels. This removes the small protruding hook that forms there.

Don't confuse a parting tool with a corner chisel. The bevels of parting tools are ground on the outside; bevels of corner chisels on the inside.

Sharpening a Parting Tool


1
It’s difficult to sharpen the bevels of a parting tool and arrive at the correct side profile, with the ears leading the nose. Instead, grind the profile first by feeding the nose of the tool into a sharpening machine. This flattens and dulls the cutting edges, but you can use these flat edges as a guide to maintain the desired profile.


2 After grinding the profile, sharpen the bevels. If you’re using a sharpening machine, make a guide block with angled sides and clamp it to the tool rest. As you work, constantly check the flattened cutting edges. As the flats grow thinner, the inside and outside surfaces must remain parallel. Stop immediately when both flattened edges disappear. When this happens, the cutting edges are ground to a keen point, the bevels are equal, and the ears lead the nose.

3 As you sharpen, the nose of the V-tool will develop a slight protrusion or hook. Remove the hook by grinding the point of the V (where the bevels join) to the same angle as the bevels. Be careful not to grind too much; remove just enough metal to eliminate the hook.

Back to the top
 

 "Abundant to all the needs of man, how poor the world would be without wood."
Eric Sloane in Reverence for Wood


Sharpening/Sharpening Parting Tools and V-Gouges, part of the Workshop Companion,
essential information about wood, woodwork, and woodworking.
By Nick Engler.

Copyright © 2009 Bookworks, Inc.