Name Holly
Location Southeastern North America
Texture/Grain Fine/Closed
Specific Gravity
0.50
Hardness
Hard
Strength
Strong
T/R Stability
9.9/4.8%


Guide

Woodworking
Know-How

Woodworking
Tools

 Up     

Sharpening

1. How a Tool
Cuts Wood

2. Sharpening
Know-How

3. Sharpening
Tools & Materials

4. Sharpening
Chisels & Plane Irons

5. Sharpening
Skews & Gouges

6. Sharpening
Parting Tools

7. Sharpening
Knives

8. Sharpening
Hand Saws

(You are here.)

9. Sharpening
Drill Bits

10. Sharpening
Scrapers

11. Touching Up
High Speed Cutters

12. Sharpening
Resources


Looking for
something?

Try these navigation aids:

  Site Map

Site Index

Search the
Workshop Companion

        
Something to share?
Please:

Contact Us!

he teeth of handsaws are sharpened with files. You need a mill file to joint the teeth at the same height, and a three-square (triangular) file to sharpen the edges. Additionally, you’ll need a saw jointer to hold the mill file and a saw set to set (bend) the teeth.

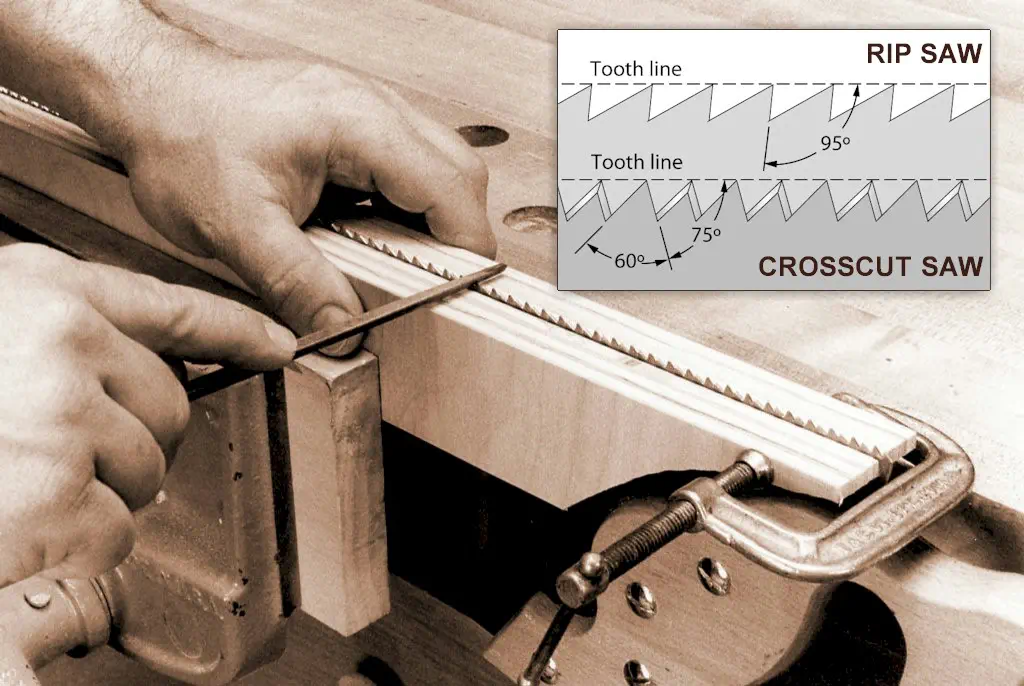
If the teeth are extremely worn or damaged, joint them flat and even with a mill file. Then re-cut or shape the teeth with a three-square file. Set the reshaped teeth alternately left and right, then sharpen them with a triangular file.


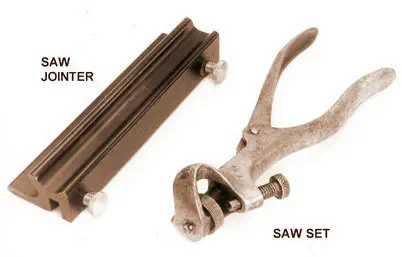
SAW SHARPENING TOOLS

Sharpen dovetail saws that are used exclusively for cutting dovetails as rip saws. The saw will be easier to start and guide, and you’ll get a smoother cut.

Sharpening a Hand saw


1
Clean the handsaw and inspect the teeth. Compare the lightly used teeth near the heel of the saw with the heavily used teeth near the middle. If the middle teeth are worn down, or any teeth are damaged, joint the teeth with a mill file. Clamp the file in a saw jointer and run it along the saw until there’s a small, shiny spot at the tops of all the teeth. When this happens, all the teeth are the same height.


2
When jointing removes more than a third of the height of the teeth, re-cut the shapes with a three-square file. Clamp the saw between two long scraps and align the scraps about 1⁄16 inch below the old gullets. If you’re sharpening a rip saw, cut hooked teeth with faces 95 degrees from the tooth line. For a crosscut saw, cut sloped teeth with the faces 75 degrees from the tooth line. Stop cutting when the file reaches the scraps. Inspect the teeth — they should all be pointed with no shiny flat spots.


3
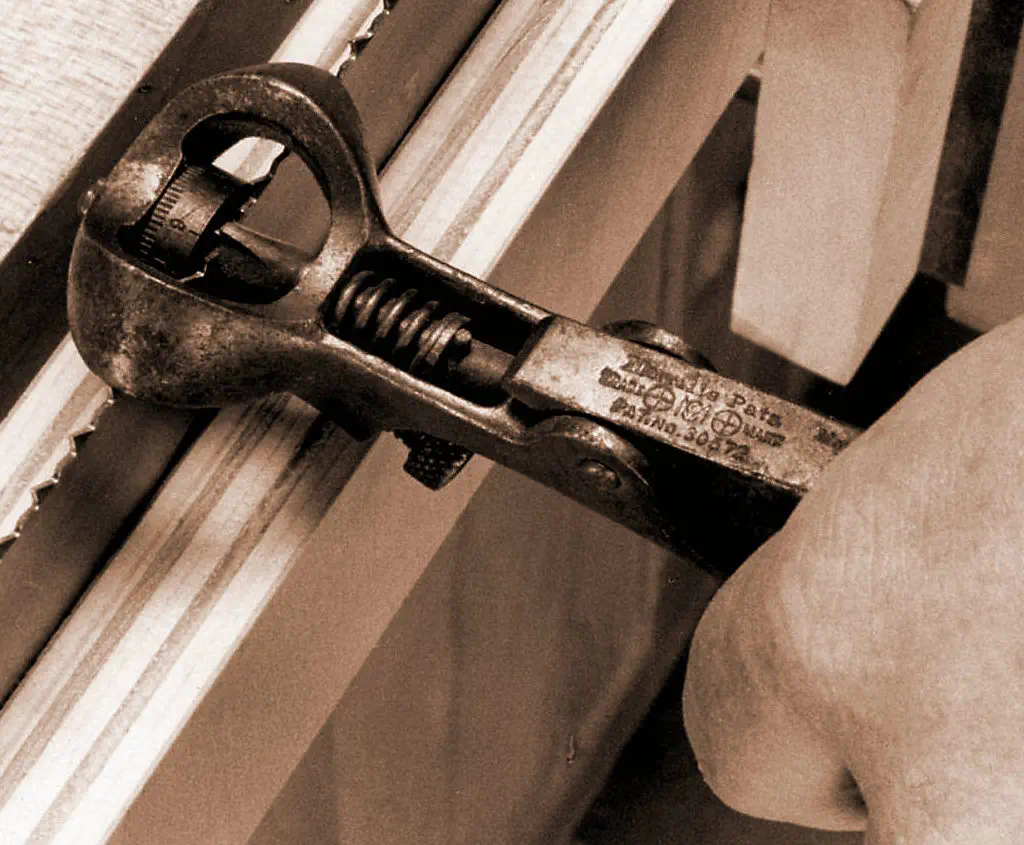
Saw teeth are bent slightly right and left so the kerf will be wider than the blade. This prevents the saw from binding in the cut. Bend the teeth with a saw set, adjusting it to bend each tooth about one-third of the blade thickness. Bend every other tooth to the right, then bend the teeth in between to the left.


4
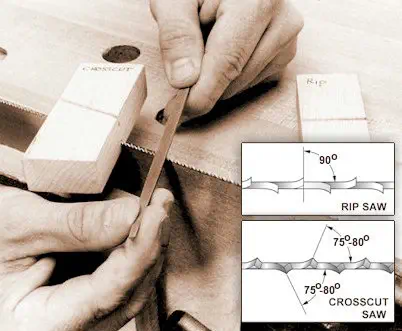
After setting the teeth, sharpen them with a triangular file. File rip saw teeth straight across, perpendicular to the saw blade. For a crosscut saw, work at a 75 to 80 degree angle to the saw body. First file the teeth that are set to the right, working from the left side of the saw. Then switch sides and file the teeth that are set to the left.
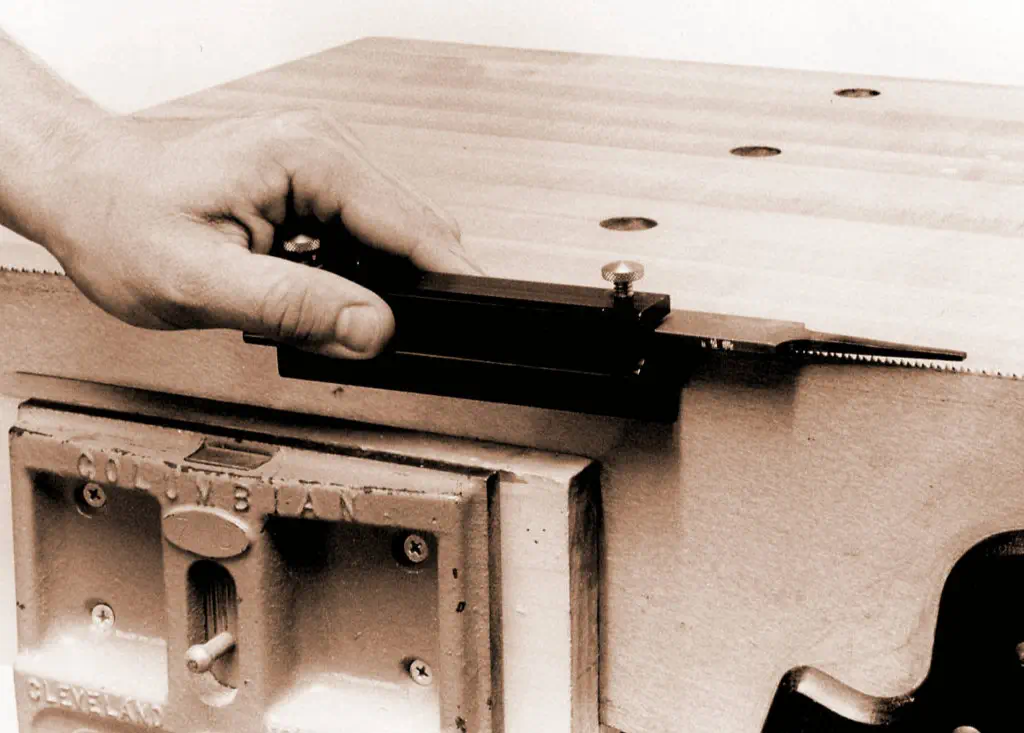
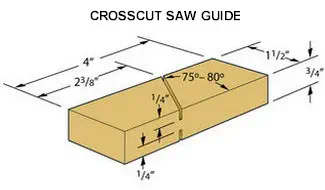
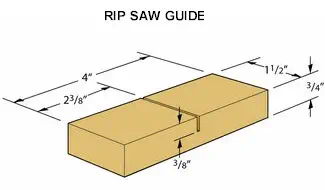
To help maintain the correct angle when sharpening a hand saw, make a guide block for a rip saw and a crosscut saw. Position the guides over the saw teeth and hold the file parallel to the guide as you work.

Back to the top
 

 "Abundant to all the needs of man, how poor the world would be without wood."
Eric Sloane in Reverence for Wood


Sharpening/Sharpening Hand Saws, part of the Workshop Companion,
essential information about wood, woodwork, and woodworking.
By Nick Engler.

Copyright © 2009 Bookworks, Inc.