Jointing Know-How

The jointer is a simple tool to use and essential for truing wood surfaces. But there are two considerations of which you must be aware. First, the jointer must be aligned and adjusted perfectly for good results. Second, it is one of the most dangerous tools in your shop; watch where you place your hands.

CHECK THE SETUP

Whenever you change or sharpen the jointer knives, check their height relative to the outfeed table. At the top of their rotation, they should be almost dead even with the table surface, maybe just 0.001 to 0.003 inch above it. If they’re too high or too low, you can’t make a straight cut. Too high, and the jointer will make a slightly concave cut; too low and the cut will be convex.

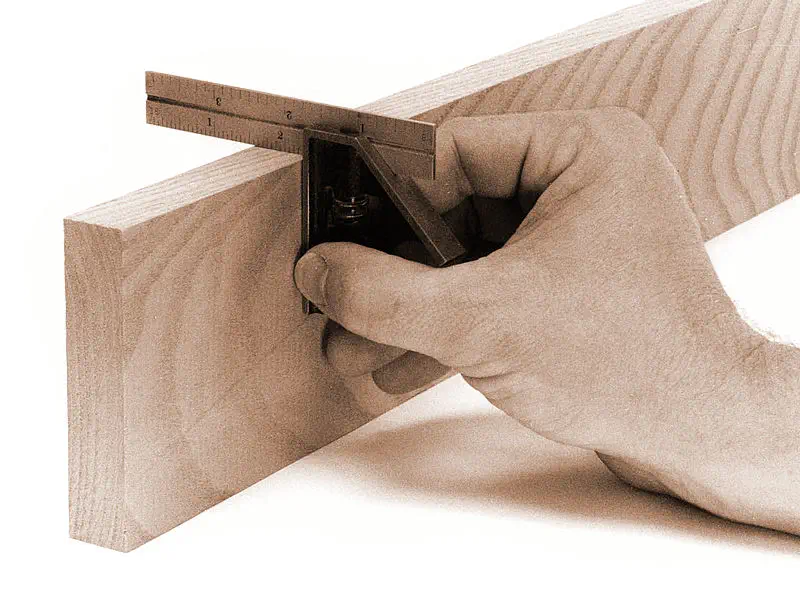
Whenever you move the fence, check its angle to the tables with a square or protractor. I also suggest doing this whenever you set up to prepare lumber for a project or do a lot of jointing tasks even if you haven't moved the fence. It's impossible to underestimate the amount of grief this simple precaution can save.

CHECKING THAT THE JOINTER MAKES STRAIGHT CUTS

board with snipe

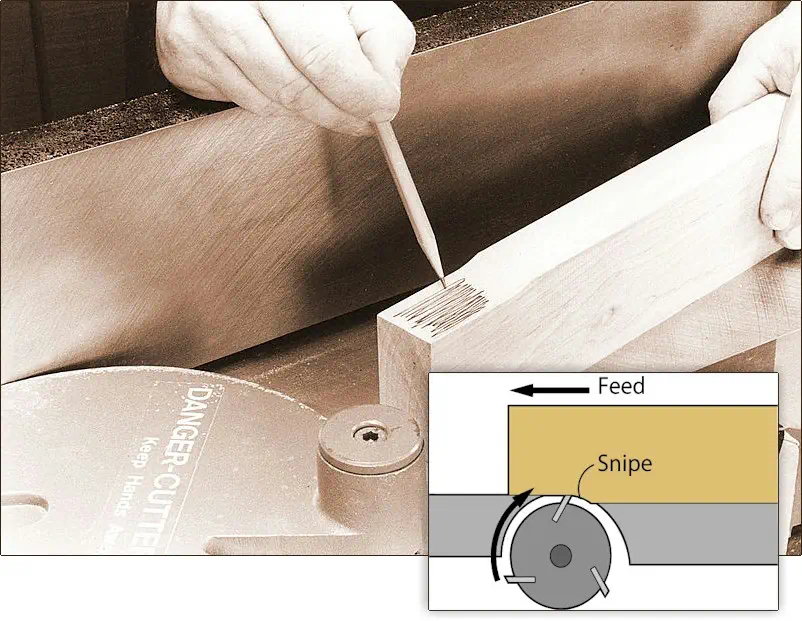
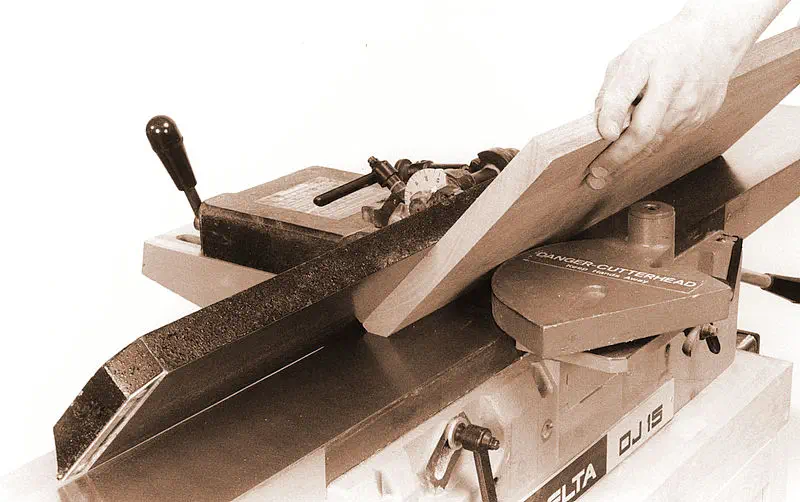
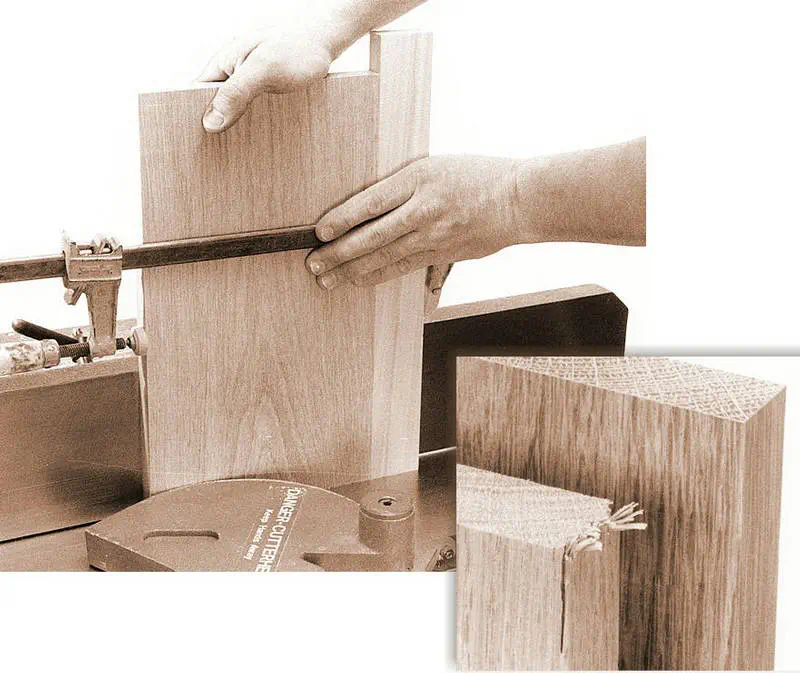
1 To check that your jointer is cutting a straight edge, joint the first 1 or 2 inches of a test board to create a snipe in the edge. Shade the snipe with a pencil.*

board with no snipe

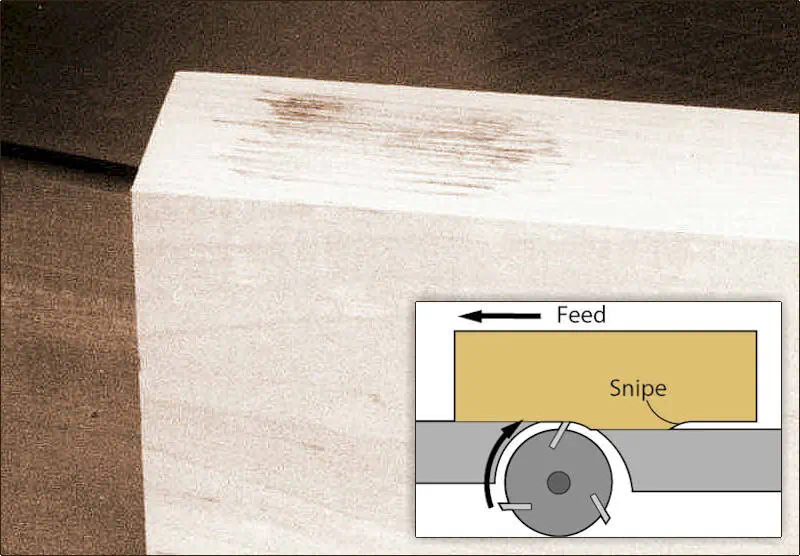
2 Turn the board around and joint the entire edge. (You should cut the snipe last.) Check the snipe — the knives should have shaved off most of the pencil marks, but they should still be barely visible. If the marks are untouched, the knives are too low in relation to the outfeed table. If they have been removed completely, the knives are too high.*

Straight & True

Whenever possible, don’t just check the tool setup. Make test cuts and check the results. Only then can you tell if the tool is adjusted properly.

CHECK THE STOCK

Because dirt is abrasive, clean dirty wood with a stiff brush before you joint it. This will help keep the knives sharp. Don’t joint painted wood or plywood — these, too, contain abrasives that dull the knives. And avoid used lumber at all costs: It may contain embedded nails or broken screws that will nick the knives.

Also inspect the lumber to find its grain direction and any warps, twists, or bows. Grain rarely runs straight through a board, parallel to its surfaces. There is usually a slight angle between the grain direction and the face or edge. This is called the grain slope. You want the knives to shave the wood down the grain slope, or "downhill" as you joint. If the knives cut "uphill," they will dig into the grain, lift it, and tear it or gouge it.

If the board is slightly distorted, you'll want to feed it with the concave surfaces against the tables or the fence. This way, it will be as stable as possible while you work. If you feed it with the convex surfaces against the jointer, the wood will tend to rock.

Reducing Mill Marks

jointer blade direction illustration

If the wood chips and tears as you cut it, you are cutting against the grain. (This is sometimes called “cutting uphill.”) Turn the wood around and feed it in the opposite direction to cut with the grain (“downhill”).*

GOOD TECHNIQUE

As you work:

  • Wax and buff the tables and fence to help the wood feed easily.
  • Adjust the height of the infeed table to control the depth of cut. Make deep cuts (greater than 1⁄16 inch) only when you must quickly remove stock. Use shallow cuts (less than 1⁄32 inch) to finish up — these leave a smoother surface.
  • Stand beside the jointer, opposite the fence, so if the wood kicks back, you’ll be out of the way.
  • Keep the wood firmly against the jointer fence and the tables. Start with it pressed flat on the infeed table, then shift the pressure to the outfeed table as you feed the wood.
  • Feed the wood slowly. This creates the smoothest possible cut.
  • Cut with the grain (or "downhill") so the wood doesn’t chip or tear out.
  • Manipulate the wood with push shoes and push blocks to keep your hands away from the cutterhead.
  • If the board is cupped or bowed, joint the concave surface first.

CHECKING THAT THE JOINTER MAKES SQUARE CUTS

board with square

Make a test cut to determine that the jointer is cutting one surface square to another. Don’t presume that just because the fence is square to the tables, you’ll get a square cut. If the knives are cocked slightly, the jointer will still cut at an angle.*

REDUCING MILL MARKS

board with  mill marks

Because the jointer knives travel in an arc, each cut creates a scallop. The ridges between the overlapping scallops are known as mill marks. These can ruin the appearance of your project. To keep mill marks to a minimum, feed the work slowly and use a shallow depth of cut.*

JOINTING SMALL PARTS

jointing small part with jig

When jointing small parts (less than 12 inches long), fasten them to the bottom of a push shoe with double-faced carpet tape. This will help you handle them safely. WARNING! Never joint anything shorter than three times the distance between the infeed and outfeed tables, or 6 inches minimum.*

JOINTING AT AN ANGLE

jointing board at angle

When jointing a bevel or a chamfer, tilt the fence toward the table. This captures the work and makes it easier to maintain an accurate angle. If you tilt the fence away from the table, the work tends to slide.*

JOINTING END GRAIN

jointing end grain

To joint end grain, clamp the work to a large scrap to help support it. The scrap also backs up the stock, keeping the knives from chipping and tearing the trailing edge.*

Just To Be Safe

When feeding the work, never place your hands directly over the cutterhead. If the wood kicks back severely, your hand could drop straight into the cutterhead. To make matters worse, the rotation of the knives will draw you hands and fingers in like a meat grinder.

Push Shoe With Pop-Down Heel

Push shoes let you hold a board firmly against a table or fence while protecting you from harm. Should you slip, the jig will fall into the cutter, not your fingers. Push shoes have soles to apply pressure and heels that you can hook over the work to feed it. This particular shoe has an adjustable heel that slides out of the way when you don’t need it.

Push Shoe With Pop-Down Heel
chisel edge geometry

Back to Top