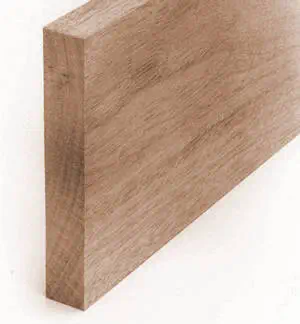
Truing Lumber

Preparing boards with surfaces that are perfectly straight, flat, and square to one another requires a combination of jointing and planing techniques.

BUSTING DOWN LUMBER

Start with thoroughly shop-dried stock. Measure and mark the parts of your project on the boards. As you do, leave extra stock, making the parts 1 to 2 inches longer and 1⁄2 to 1 inch wider than their final dimensions. Cut and rip the boards, roughing out the parts.

Craftsmen refer to this as "busting down" rough lumber, and it relieves stresses in the wood. As the tree grows, it often buttresses itself against wind or gravity. Drying may create further stress. These internal tensions remain until you release them by cutting the wood apart. As they are released, the wood moves slightly. But since you’ve cut the parts oversized, you have the extra stock needed to true them.

TRUING BOARDS

To true a rectangular board, first joint one face flat and true. Turn the board so the true face is against the fence and joint an edge. Plane the remaining face parallel to the jointed face, and rip the remaining edge parallel to the jointed edge.

Traditionally, you're supposed to true the last edge on the jointer. However, the jointer does not cut one edge parallel to the other. If you finish with the jointer, there is a chance you're board won't be precisely rectangular. Additionally, today's line-up of high-quality saw blades make such a smooth cut (if your table saw is properly aligned) that you may not need to joint the last edge. The saw marks will be no more prominent than the jointer's mill marks and you can remove them with a light sanding or scraping.

How you finish the last edge depends on how the board will be used. If it's more important that the board be rectangular (edges and faces parallel, as in a table apron or a drawer side), rip the last edge and call it quits. If it's more important that the edges be true (such as boards you will glue edge-to-edge to make a table top or wide panel), then joint the last edge. If the edges must be true and the board as close to rectangular as possible, rip the board to within 1/32 inch of the final width, then remove the last 1/32 inch with the jointer.

true board

Straight & True

If the board is thick enough that you can safely stand it on its edge or you have several boards that you can stack together and stand them on their edges, you can plane the work to its final width as you would when preparing square stock. This will leave the board(s) straight, true, and precisely rectangular.

PREPARING BOARDS

wood board 1

1 Joint one face.

wood board 2

2 Joint one edge square to jointed face.

wood board 3

3 Plane remaining face.

wood board 4

4 Rip or joint to width. Or rip towithin 1/32" of the desired width and remove 1/32" with the jointer.

SQUARING STOCK

To true square stock, joint two adjoining surfaces true and square to one another, as you do when truing a rectangular board. Mark these two jointed faces (so you remember which they are) and plane the remaining surfaces parallel to the jointed surfaces. Plane both remaining surfaces with the same thickness adjustment. The stock will be perfectly square

True square stock

PREPARING SQUARE STOCK

wood stock 1

1 Joint one surface.

wood stock 2

2 Joint an adjoining surface square to the first.

wood stock 3

3 Mark the jointed surfaces. Plane a remaining surface.

wood stock 4

4 Plane the final surface. Do not change thickness.

Common Machine Issues and Solutions

Problem Possible Cause Solution
Jointer cuts a slightly bowed surface. Knives are too high or too low in relation to outfeed table. Reset knives or adjust outfeed table.
Jointed surfaces are not square. Fence is not square to tables.
Knives are not parallel to table surfaces.
Reposition fence.
Reset knives.
Wood drifts to one side in planer. Feed roller pressure is uneven. Adjust roller pressure.
Wood thickness is not even. Planer knives are not parallel to bed. Reset knives.
Planer cuts snipe in ends of board. Feed roller pressure is too low.
Bed rollers are too high.
Long board is not properly supported.
Increase roller pressure.
Lower bed rollers.
Support board with roller stand.
Machine bogs down, trips circuit breaker. Depth of cut is too deep.
Feed rate is too high.
Reduce depth of cut.
Reduce feed rate.
Wood is difficult to feed, seems to stick. Planer bed or jointer tables require waxing.
Planer feed roller pressure is too high.
Planer bed rollers are too low.
Wax and buff bed or tables.
Reduce roller pressure.
Raise bed rollers.
Machine chips or tears wood grain. Knives are cutting against the grain.
Wood grain is figured.
Knives are dull.
Reverse board end for end, or reduce feed rate or depth of cut.
Reduce feed rate or depth of cut, or rout and sand stock to thickness.
Touch up, sharpen, or replace knives.
Machine leaves noticeable mill marks. Feed rate is too high.
One knife is set too high.
Reduce feed rate.
Reset knife.
Machine leaves raised lines. Knives are nicked. Sharpen or replace knives.
chisel edge geometry

Back to Top